Add accounts
Accounts are added on the account page. To get to the account page just click on the "Accounts" icon on the main menu at the top. Click the "Add" button above the account list to add an account. Accounts can be assigned a country and/or currency. The currency selection is what really matters and is used when currency conversion is required. If accounts with different currencies are being used it is recommended to select a currency to allow for currency conversion. Both accounts and transactions offer a context menu accessible through a right-click of the mouse.
Add a checking account
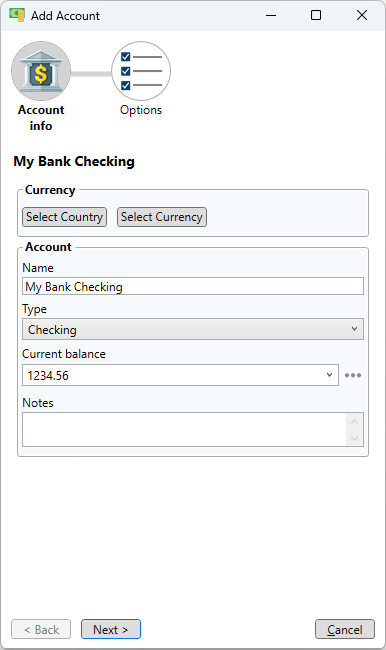
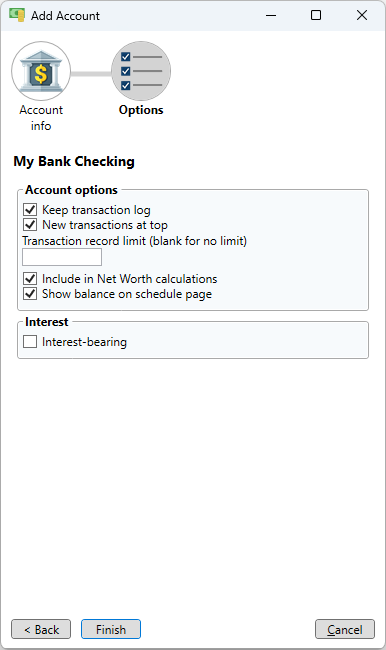
For most people the checking account is where most pay bills are paid from. The name can be anything you want but the type must be set to "Checking". Enter the current balance then click the "Next" button to select account options. Select the recommended options by checking the appropriate boxes as shown below. When done click the Finish button.
Add a savings account
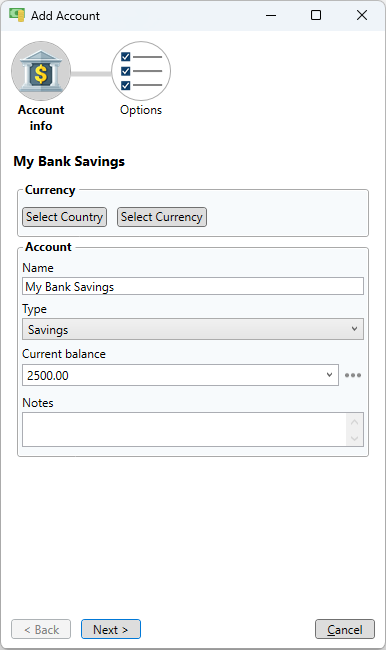
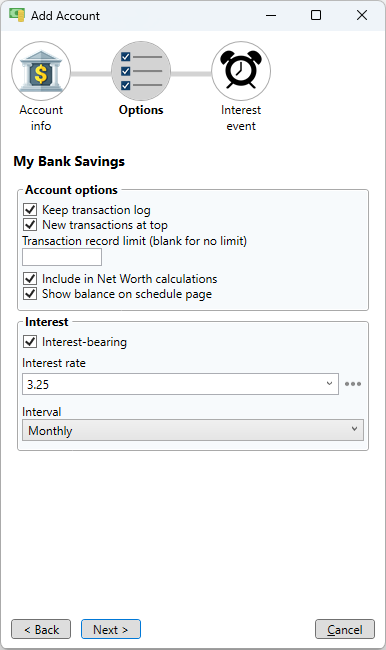
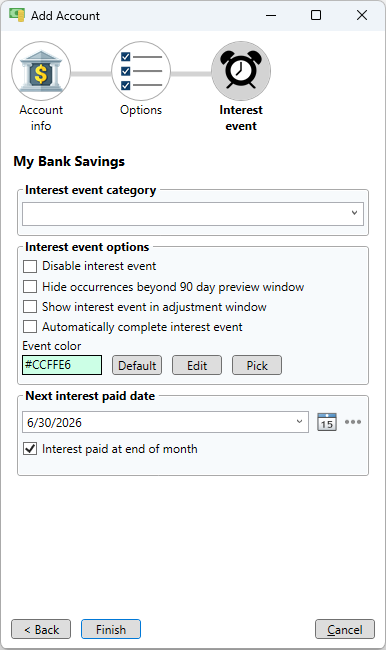
Assign a name for the savings account and set the type to "Savings". Enter the current balance then click the "Next" button to select account options. Select the recommended options by checking the appropriate boxes as shown below. Note that savings accounts pay interest so the "Interest-bearing" checkbox is checked and an interest rate has been entered. Click the "Next" button to set up the interest event. The only required entry here is the "Next interest date" although it is recommended to hide interest events on the schedule page beyond the preview period for a less cluttered appearance. Interest events appear on the schedule page with all the other events. On the events page the interest events are listed in the lower event list with the account events. When done click the Finish button.
Add a tax deferred account
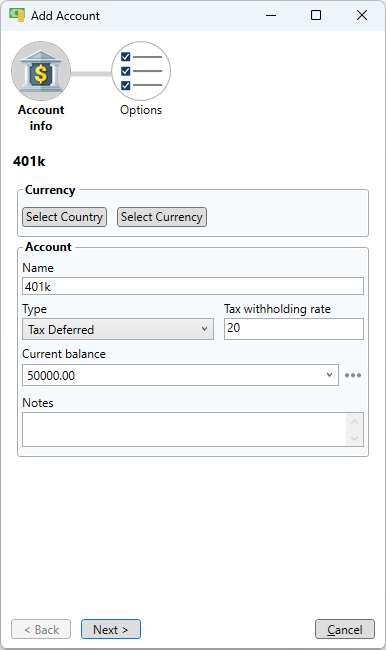
A tax deferred account, like a 401k or IRA, is just like a savings account except no taxes are due until a withdrawal is made. If money is transferred out of the account then taxes are withheld according to the tax withholding rate entered. If you have a Roth account or something similar enter it as a savings account since there is no withholding for those accounts.
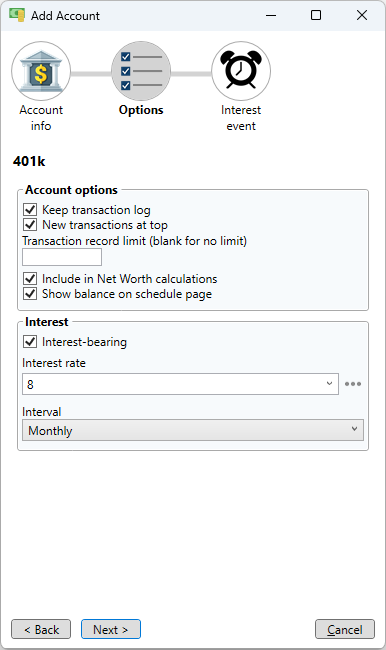
Your tax deferred account is probably not just cash earning a specific interest rate, but you can make an assumption about how much your account will grow over time even if it is a mix of stocks, bonds, CD's or other investments. If you have an aggressive portfolio that is heavy on stocks you will probably earn more, about 10% per year on average, than one that is only in CD's. Enter your expected annual growth rate as the interest rate, but remember that it is better to assume a lower growth rate to ensure you will actually meet the projected balances.
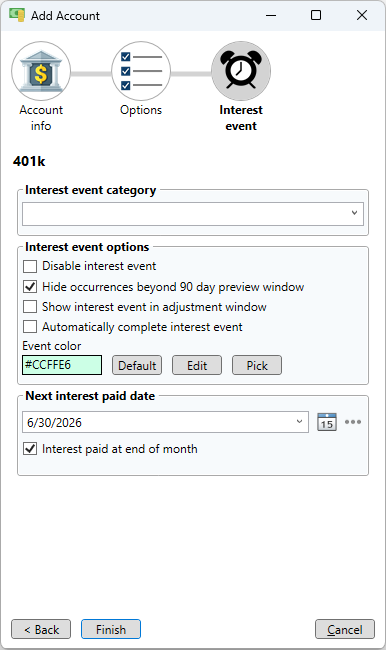
To create a tax deferred account enter the name and select "Tax Deferred" for the type. Enter the tax withholding rate and current balance then click the "Next" button to select account options. Check the "Interest-bearing" checkbox and other options. Enter the interest rate for your tax deferred account then click the "Next" button to set up the interest event. The only required entry here is the "Next interest date" although it is recommended to hide interest events on the schedule page beyond the preview period for a less cluttered appearance. Like a savings account the interest events appear on the schedule page with all the other events. On the events page the interest events are listed in the lower event list with the account events.
Add a credit card account
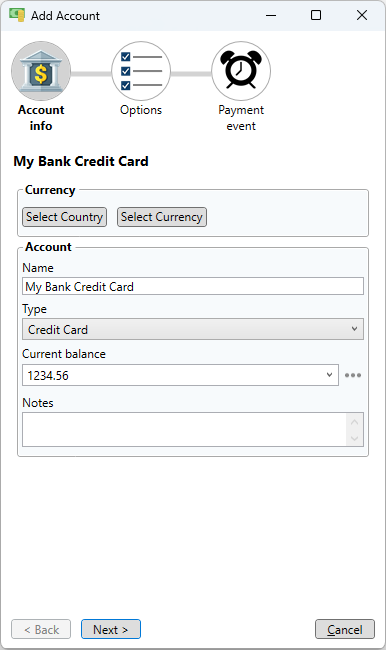
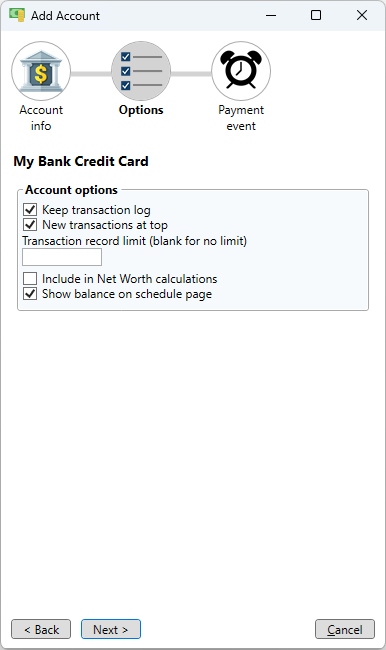
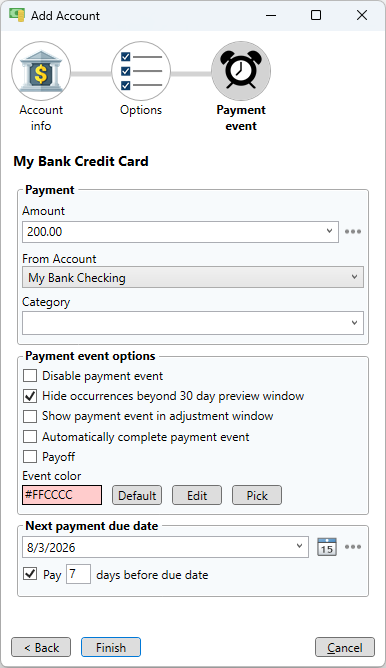
Pick a name for the credit card account and select the "Credit Card" type. There is also a "Credit Account" type which is for revolving credit accounts like home equity lines of credit, but function exactly like a credit card account. The current balance is optional and can be left empty if you don't carry a balance from month to month. Click the "Next" button to select the credit card options then again to set up the payment event. For the payment amount enter an average amount you would pay on this credit card every month. You could just enter a payment amount of 0 but to predict future account balances it is best to put in an average. Pick which account to make the payment from, payment options and the next payment date. For less clutter on the schedule page, check the option to hide payment event occurrences beyond the preview window. Also, when setting the next payment date, it's a good idea to set the payment date a week or so before the payment is due. When done click the "Finish" button. Payment events appear on the schedule page with all the other events. On the events page the payment events are listed in the lower event list with the account events.
Add a mortgage or car loan
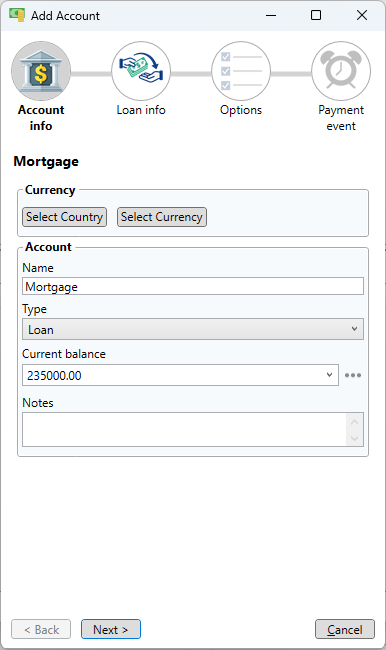
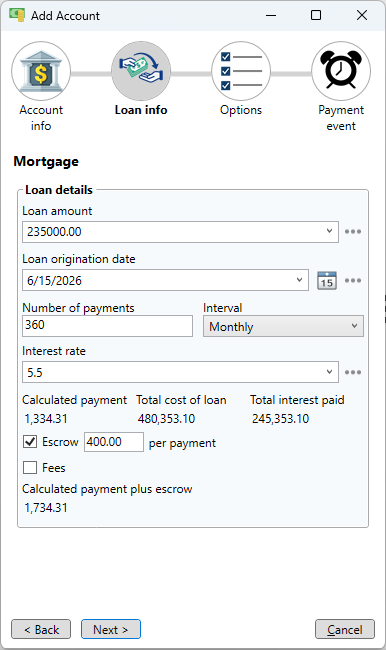
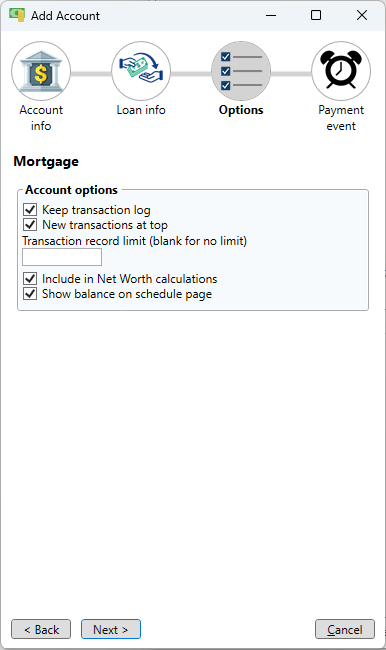
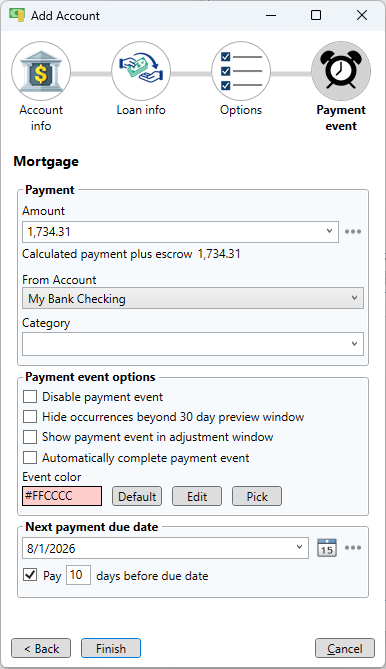
Enter a name for the loan and select the "Loan" type. Enter the current balance then click "Next" to enter the loan information. Enter the loan amount, loan origination date, total number of payments and interest rate. If there is an escrow payment check the "Has escrow" box and enter the amount. Do the same if there are any fees. Once that information is entered the calculated payment is shown. Click the "Next" button and select the loan options then click "Next" again to set up the payment. The payment amount will default to the calculated anount but it can be set to anything. Select which account the payment will come from, the payment options and the next due date. For less clutter on the schedule page, check the option to hide payment event occurrences beyond the preview window. Also, when setting the next payment date, it's a good idea to set the payment date a week or so before the payment is due. When done click the Finish button. Payment events appear on the schedule page with all the other events. On the events page the payment events are listed in the lower event list with the account events.